Welcome! Velkomin! Wilkommen! Bienvenue!


Showing posts with label my own. Show all posts

Sunday, October 6, 2013

new things

Since just about everything in my life has been changing in the most positive way lately, I thought a make-over for my blog would be the appropriate thing to do :-) 

I really hope you like it - I think it looks more calm, clean, "grown-up" and just like Johanna from knittingmydayaway put it: "crispy". At least, I like it this way and I hope you do too! 

I´ll see you later this week, with a new baby-cardigan I made (crochet) for my irresistible little niece, Gerður Lilja. I used baby lama from my one of my favorite yarnstores, "litla prjónabúðin" and icelandic unspun wool.

(as you can see, I´ve been playing around with instagram and our cute little samsung tablet)

Sunday, November 25, 2012

Stitch markers


Lately I´ve been feeling like my stitch markers don´t fit my knitting needles - it might have something to do with the fact, that I've been knitting a lot with needles nr. 10-15 since last summer :-) That´s why I decided to make my own, perfect sized stitch markers...

I went to a great craft store (í Holtagörðum) with some stitch markers I´d bought&liked and simply asked them how they where made. They were really helpful and showed me all the right stuff...

I used pearls in different sizes and shapes and felted balls I made with my boys the same day - you could use so many different things, just use your imagination! (mæli með búðum einsog Tiger og Söstrene Grene í perlukaup). 

I can´t wait to make more of those and some special people 
might even get some of those for christmas...


Wednesday, July 4, 2012

natural dyed wooden beads


I´ve seen people write about their experience with dyeing wooden beads (ólakkaðar og ómálaðar tréperlur) with natural dyes, on different blogs. Inspired by those blogs and some pictures on Pinterest I decided to give it a try!

I got some wooden, undyed beads (Litir og Föndur, Skólavörðustíg) and let them cook together with some wool in Alum - I don´t know if it makes any sense using Alum... but I did it anyway! :-)

I then tryed out the following dyestuff:
1. Curcuma (Túrmerik)
2. The liquid from pickled Red beetroot
3. Grounded chili and paprika
4. Cranberry Apple Zinger Tea from Celestial Seasonings
5. Loyd´s Blackberry&Blueberry-tea

How I did it:
I poured boiling water over the dyestuff in different jars. I put the jars out in the sun on my balcony and let the beads soak in the liquids for 2 days and 1 night - I occasionally shook the jars a little bit.

Result:
I was really amazed and at the same time disapointed by the result - only 2 of the things above gave some colour:

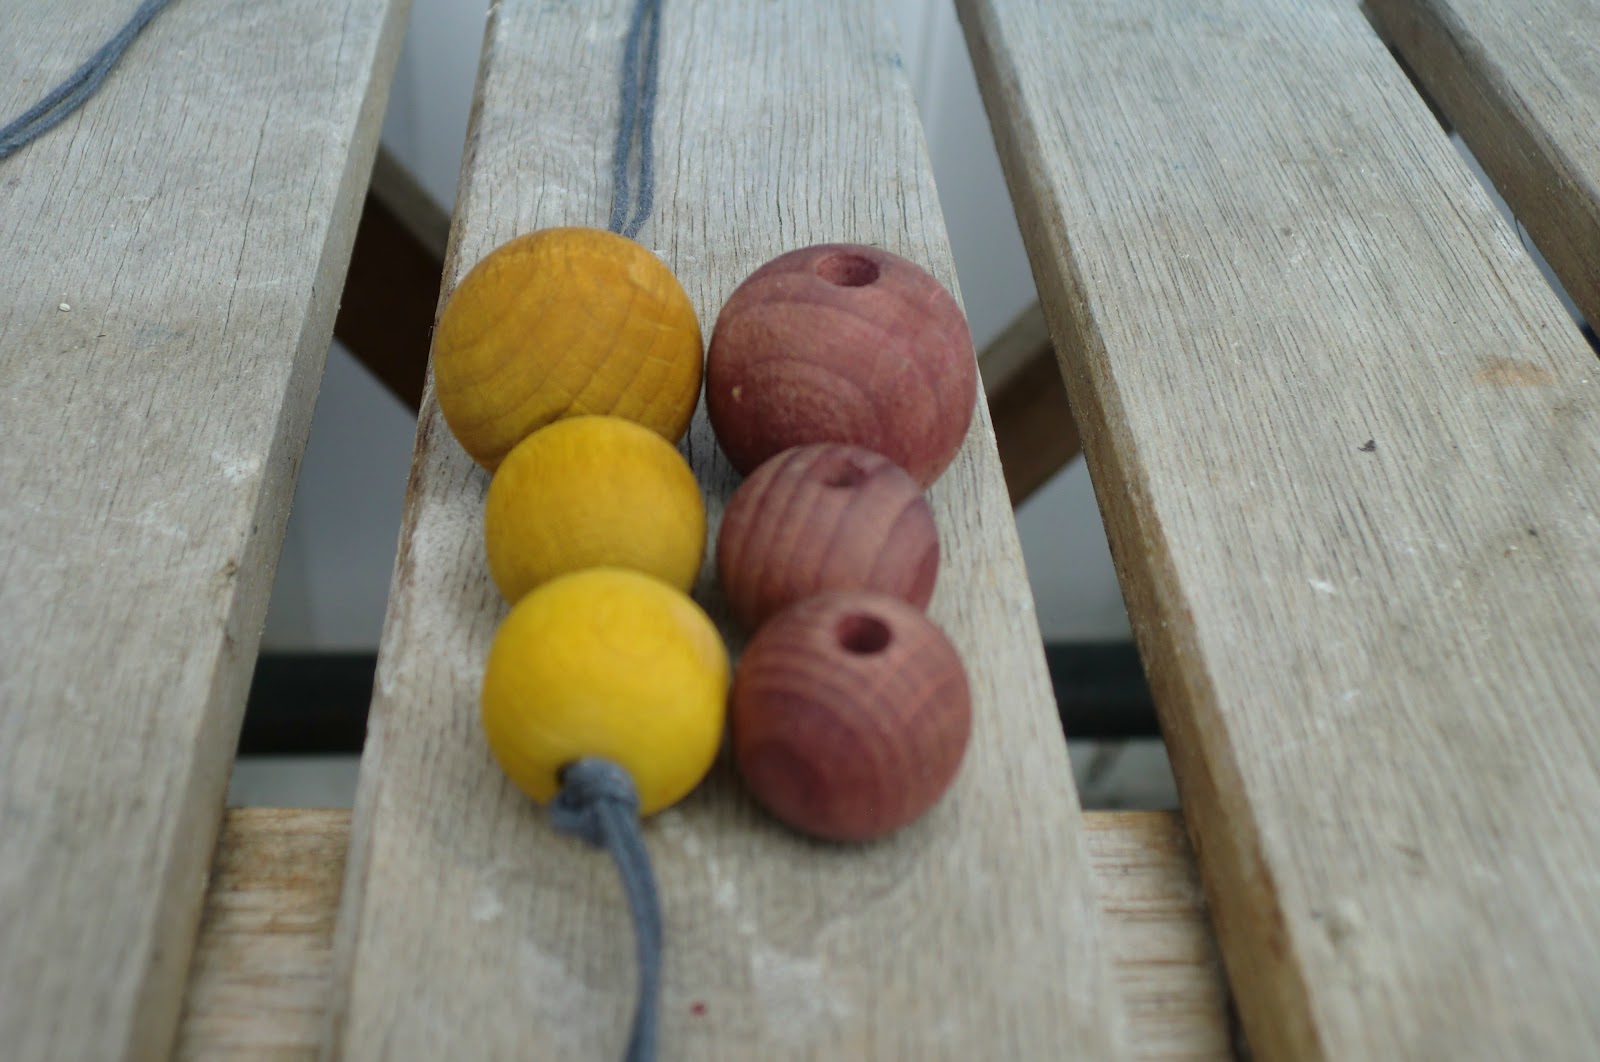
1. Curcuma: great result; wonderful, mustard-yellow
2. Loyd´s Blackberry&Blueberry-tea: an interesting purple-brownish... I kind of like it...

I expected that the beetroots would give the best bead-dye (pink) - but I was really surprised and disapointed that my wooden beads didn´s soak in any colour at all! I wasn´t really expecting much of the chili/paprika-blend and the Zinger Tea...

Other natural bead-dyes I tryed out: 
I also tryed boiling the beads together with some wool with different plants that normally give you a strong colour like rhubarb-leaves, madder root, red and yellow onionskins - but none of those things worked out as a bead-dye (no colour at all).

Now I´m wondering:
1. Can you think of any other possible well-working bead-dye-material I could try out?
2. Should I try getting a different kind of  undyed wooden beads in another store?

Me and my older son love the result - we now fight over who get´s to wear them... I´ll have to let him make his own... ;-)
Curcuma-beads... yummi, love them!

Loyd´s Blackberry&Blueberry-tea-beads - nice...

Monday, July 2, 2012

My roots


It has been a dream of mine for some time now, to dye with rhubarb-roots (rabbarbararót). It´s not easy to get this dyematerial, so that beeing able to make a strong dye from those roots has only been a dream of mine... until last friday! The thing is, that day my cousin G. called and told me he knows somebody who is getting rid of rhubarb in their garden and if I wanted to and could go there right away, I could get some rhubarb-roots. 
I drove like a mad person to Garðarbær and was expecting to get 1-2 roots... but never in my dreams did I imagine that I would drive back home with 2 big garbage bags, filled with roots! Wow... what an amount of roots... and how much beautiful colors could I possibly get out of this dyematerial!! 
Now I just have a really tiny problem: how to dry this amount of roots without filling up every empty space in our really small 3-room flat? We´ll see... wo der Wille ist, ist auch ein Weg... 

Thanky you so much cousin G. - you made me really happy and I can´t wait to make a strong rhubarb-roots-dye! 

 A huge root... gigantic!

shades, texture, sweet smell...

  cutting the roots so that they´ll dry faster and better

beautiful from the inside... 

 
so much dye-material - love it! 

Another thing I wanted to share with you are 2 dyeing-experiments I did the other day:

I dyed some kambgarn (wool) with the roots of Rumex acetosella (hundasúra). I had read on the internet, that it should give you pink or grey color.  I used Alum and then dyed with the roots, and got a pretty brown colour out of it. Even if I washed it out with a small amount of salmiak spiritus, it only got a slightly different brown shade. It´s quite similar to the brown colour you get from coffee - and coffee is so much easier to get than those small and tiny roots, so I would prefer coffee to get this brown shade. 

kambgarn dyed with the roots of Rumex acetosella


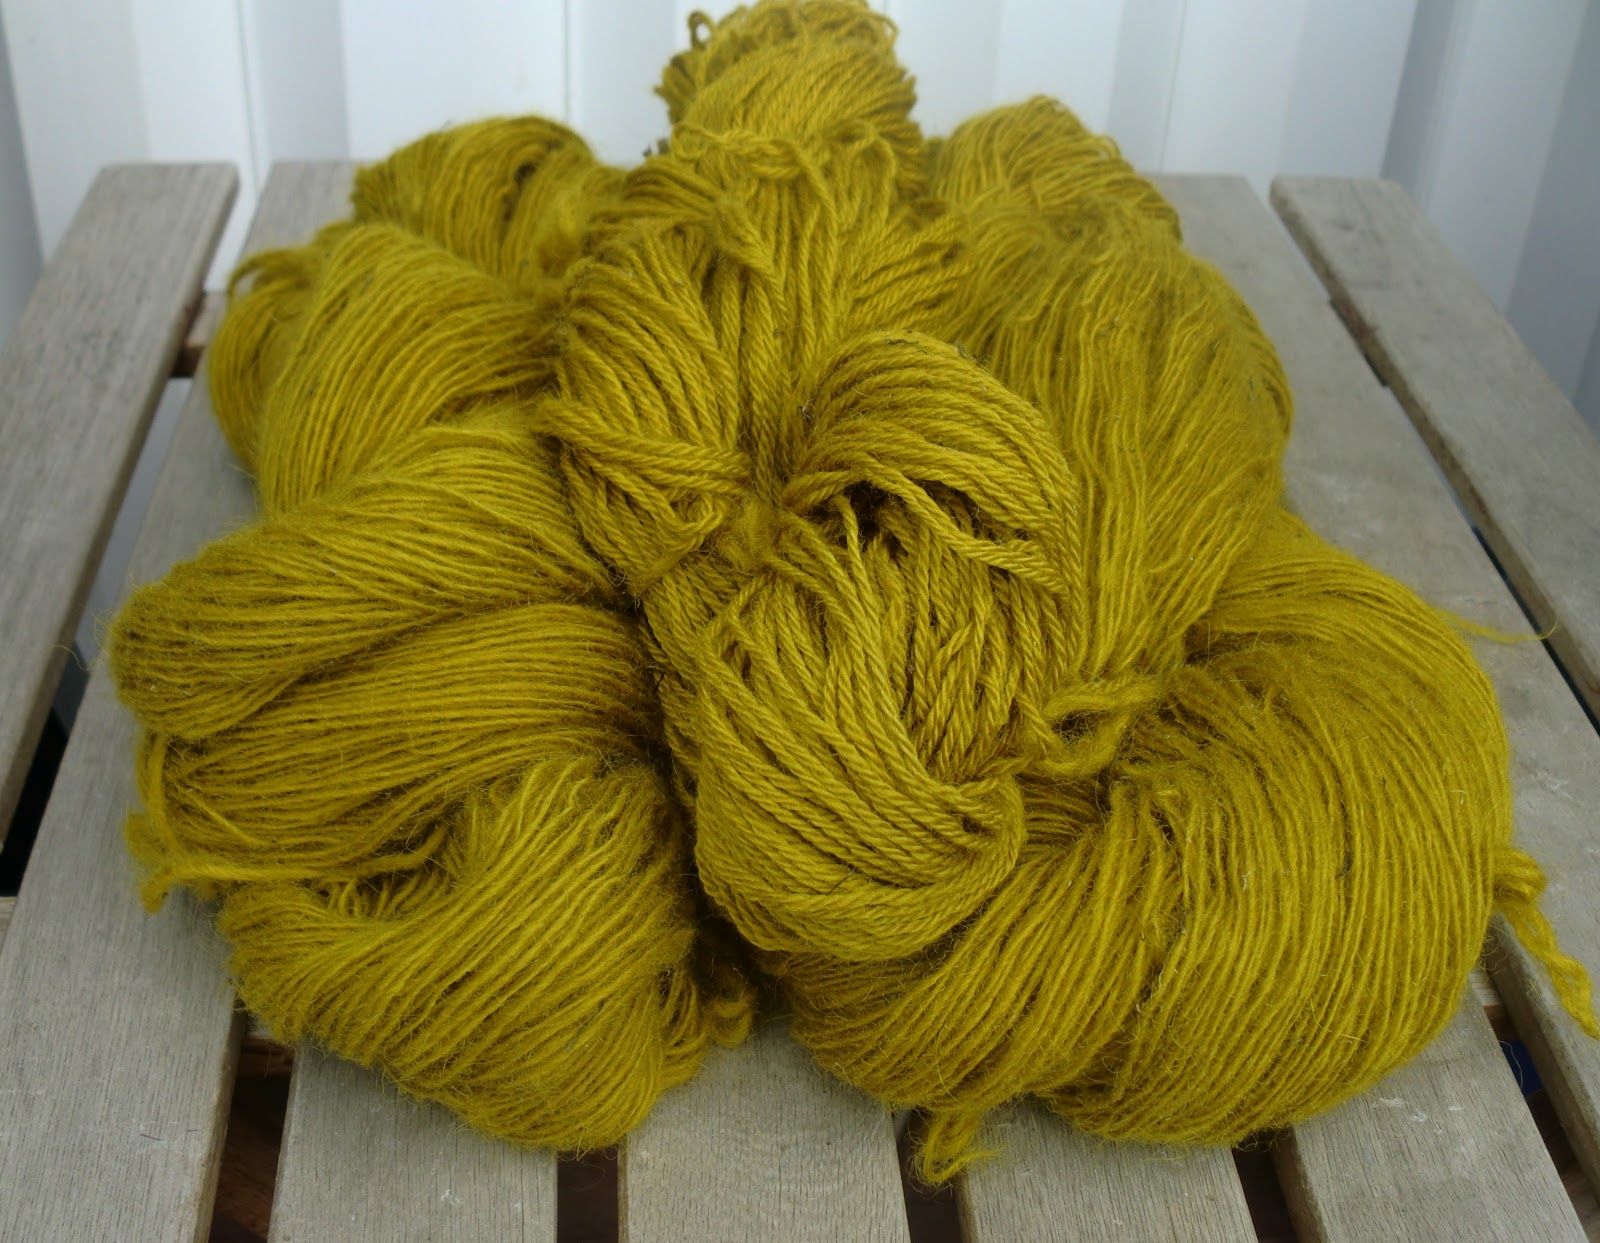
The other thing I did, was dyeing einband and kambgarn (wool) with horse-tail. I had read that it should give you a pink or a grey shade - but the only color I got was a pretty, even yellow.  Well, yellow was not the color I was expecting and aiming for - so hoping for a miracle, I tryed dyeing it again with Rumex acetosella (the leaves and flowers), since I had heard it should give you a green tone. And once again, I just got a deeper yellow... really anoyed I threw the wool into water mixed up with salmiak spiritus - and the color I got from that was just wonderful: a golden mustard but really the most pretty one I´ve ever gotten! 

I DO love this golden mustard 


Thursday, June 14, 2012

Rhubarb-love


I told you last year and I´ll tell you again today: I love rhubarb! You can cook it, bake it, dye with the leaves or use the stems as a dye-mordant! Yesterday I got some really nice and cheap strawberries and decided to make some strawberry-jam... and since I found a lot of "wild" rhubarb the other day, I wanted it to be a strawberry-rhubarb-jam. I tell you: it was so worth the effort!!

How I did it:

1 kg strawberries
500 g rhubarb
600 g sugar
1 tsp vanilla sugar 
enough red melatin to make the jam thick enough (Bónus)


I cut the fruit into small pieces and let them soak in sugar, vanilla sugar and melatin over night. The morning after I cooked the jam until the fruit got really soft and used my hand blender to make the blend smooth. Pour the jam into pretty maison jars and enjoy!


 I also wanted to show that flowers don´t always have to be storebought to be pretty and decorative! 


Forget-me-not, picked on my daily walk yesterday... got the pretty little vase in a thriftstore and I love it... 
 

wonderful colours, love the pretty the blue. yellow and white togehter...  

got this perfect little vase in a thrifstore too - perfect colourcombo: purple and turquoise... 


I picked those on my daily walk too... you can eat the flowers in the back - looks really pretty on a salad!


My older one, Bidenam picked those on his own, yesterday... isn´t this the most perfect bouquet??

wonderful Lupina...
 

Thursday, June 7, 2012

Pan - a crochet pattern


Inspired by a visit in a museum in Blönduós, Iceland last summer (2011), I improvised a collar (read about it in this post). I think crochet collars are so decorative and turn the most simple dress to something very special and unique! I´ve already made a lot of collars, using different kind of yarn and making different edgings... I´ve been wearing them a lot and I just love them!

 
Today, I finally finished writing the pattern for my collar and I call it "Pan" - I must admit, this is the first crochet-pattern I´ve ever written - but I did get a lot of help from the crochet-specialist Elín (her blog: "Handóð"). Thank you so much for your help Elín!

About my pattern:
Pan is a simple, quick, diverse and decorative collar - just choose your favorite yarn and make it in any size and length you want. With the right button and the edging of your choice, you can add your own, special personal touch to it! :-) The button actually is really important and can chance the whole look of your collar so choose wisely!

Enjoy and I´d love it if you share pictures of your finished Pan! And if you don´t have a Ravelry-account, and really want the pattern, just tell me your Email-address and I´ll send it to you!

 Pan - material: Kambgarn, dyed with madder root


Different edgings/last rows:

DC´s and triple-crochets...  

Extremely scalloped version:

Picot-edging:

Picot-edging - from one side to the other: 

Buttons are so wonderful and so important when creating a collar....


Friday, February 17, 2012

Flashback: a lopapeysa-chart


I´m´really excited to introduce you: my first very own contribution on Ravelry: Flashback, a lopapeysa-chart. This chart is designed for an icelandic adult lopapeysa made out of single stranded unspun icelandic plötulopi. But of course, you can use it for many different things like knitted cushions, embroidery, even a lopapeysa made out of léttlopi or some other materials with the same gauge (18.0 to 24.0 sts = 4 inches; 50g =100m) - if you use einband (lace), you might have to add a few rows in the beginning... just use your imagination!

I call my chart "Flashback", because working on this chart brought me back in time, and made me think of myself, drawing patterns in my math-notebook in school, instead of working on my math-skills! :-D

I´d love to see some pictures of your work, if you are using my chart! :-)

On the following pictures you can see what the chart looks like when knitted. For this sweater, I used the pattern "Freyja" by Ragnheiður Eiríksdóttir (available in english and icelandic).

Details:
Material: Þingborg-lopi
Needles: for the body: 4,5; for the sleeves: 3,5 (will use only 3,5 next time because my gauge is quite loose)
changes: modified arms (longer and different increases)- I really love the Freyja-body, shaped with short rows, decreases and increases...

My chart: Flashback
From a distance:

Shaping:
Love this buttons... old buttons from my mum - and yes, I DO have a thing for buttons...

Steeking is a strange thing...