Welcome! Velkomin! Wilkommen! Bienvenue!


Friday, February 17, 2012

Flashback: a lopapeysa-chart


I´m´really excited to introduce you: my first very own contribution on Ravelry: Flashback, a lopapeysa-chart. This chart is designed for an icelandic adult lopapeysa made out of single stranded unspun icelandic plötulopi. But of course, you can use it for many different things like knitted cushions, embroidery, even a lopapeysa made out of léttlopi or some other materials with the same gauge (18.0 to 24.0 sts = 4 inches; 50g =100m) - if you use einband (lace), you might have to add a few rows in the beginning... just use your imagination!

I call my chart "Flashback", because working on this chart brought me back in time, and made me think of myself, drawing patterns in my math-notebook in school, instead of working on my math-skills! :-D

I´d love to see some pictures of your work, if you are using my chart! :-)

On the following pictures you can see what the chart looks like when knitted. For this sweater, I used the pattern "Freyja" by Ragnheiður Eiríksdóttir (available in english and icelandic).

Details:
Material: Þingborg-lopi
Needles: for the body: 4,5; for the sleeves: 3,5 (will use only 3,5 next time because my gauge is quite loose)
changes: modified arms (longer and different increases)- I really love the Freyja-body, shaped with short rows, decreases and increases...

My chart: Flashback
From a distance:

Shaping:
Love this buttons... old buttons from my mum - and yes, I DO have a thing for buttons...

Steeking is a strange thing...

Thursday, February 9, 2012

DIY: birthdaycards


For years now, I´ve been making birthdaycards myself - why? Well:
1.: who doesn´t like personalized, homemade birthdaycards?
2. you save a lot of money
3: I love making them :-)

When I first started, I always drawed something I relate with the person, since I really love drawing. But after having 2 boys, I had to find some new, more quick methods to make them! That´s when I started using books, my boys had damaged. Now I also buy books & old magazines I find at thrift stores and no one wants to buy because there is no cover, pages are missing and they are damaged - for almost nothing! Since I hate the thought of throwing books away, giving old, torn up books a new purpose and meaning makes me really, really happy! :-)

The process is easy and what you need is:
Glue and scissors

thick paper or carton, I often use thick paper for drawing because of the nice texture:
Old, torn books no one wants anymore:

Old, torn magazines no one wants:

What you do next, is to seek some pictures you like... cut them out and glue them on the paper:


Here you have some examples you could use... a text on the card (like in cartoons) can make the card even more special and fun:
love this retro-looking-Buzz:
soooo cute and funny:
Very cool
For someone special and "yours":

For a car-fan
Girly and classic:

OR, if you have the time and skills, you can draw something:

Fairy: (love them...)
Dragon:

fish:


Have fun!

The versatile blogger award II


I´m proud and happy to be able to tell you, that once again, I´ve been nominated for the Versatile blogger award - this time by "Fra arstid til arstid"! It´s so wonderful to hear, that what I´m doing on my blog is appreciated... and since I really love her blog too, it makes me even more happy!
Hilde takes wonderful pictures of nature, creates beautiful things, always has something interesting to tell us and loves nature just like me.

The Versatile blogger award rules are: that you should pass it on to 15 blogs you like to read, and let the bloggers know they have been nominated. Then you have to share 7 things about yourself. Finally you have to thank the award giver and link back to them.

Though there are many blogs I love to read - but since I already listed 15 blogs the last time I was nominated, I´m bending the rules a little here, and nominate three bloggers for the award:

1. Knittingmydayaway: Jóhanna makes wonderful things, creates beautiful knitting patterns and takes beautiful pictures... reading her blog is a joy!

2. Rodprjonar: Rodrigo is a wonderful knitter and a wonderful person who writes about his knitting and all the amazing creative things he does on his blog. Everything he creates is just perfect and he takes wonderful, inspiring pictures.

3. Na vlne: creates beautiful things with her needles and yarn (among other things: amazing shawls)... just like me she loves buttons and leaves. I really love her sense for colours and she always has something interesting to say about her knitting-experience...

And now, again, 7 new things you probably don´t know about me:

1. Ok, this you might know: my two boys are the most wonderful and perfect thing I´ve ever created! :-)
2. I really love nature, that´s where I find my peace of mind.
3. I´m a big Finland-fan - if I ever have to leave Iceland I´ll probably go there...
4. I LOVE sauna... we have the best finnish sauna in town, in the swimmingpool/gym 2 minutes away from where I live.
5. I have 2 masters degrees - M.A. in pedagogigs (Germany 2004) and the other one, M.S. in HRM, human resource management (Iceland, 2011).
6. I´d love to learn how to make my own soap and candles...
7. My mother is teaching me how to make my own sewing-patterns and helping me to advance my sewing skills these days... I've already created my dream-60´ies dress with her last week, and I´m going to tell you all about it in the next few days!

Thanks again Hilde! :-)

Tuesday, January 31, 2012

Lopapeysa - an icelandic sweater for kids

Last week, I finished a new lopapeysa (Islandpulli) for Freyr. I´ve knitted this yoke pattern from the book Lopi 2 several times, but never in this version with buttons half way down and a hood. Freyr loves hooded sweaters and because of that, his new, thick lopapeysa had to have a hood... since I wasn´t in the mood for making a zippered sweater, I decided to give this version a try - it was a lot of fun, I learned a lot on the way and I really like the way it turned out. The best thing is the fitting of the hood- it´s tight and comfy at the same time... and the high ribbing in the neck-area is perfect for a boy like Freyr, who loves to wear lopi.

yarn: lopi
needles: 4,5 and 6
Pattern: from Lopi 2

buttons: from my mothers treasure-chest...

love, love, love the hood...

the back:

... like the colours too...
From above:

Friday, January 27, 2012

crochet candle jars

Candle lights during the dark months in Iceland make me really, really happy and bring peace to my mind... maby that´s why I´ve been so busy making different kinds of candle light-jars lately?

My last one makes me "extra" happy because it´s my first crochet-light-jar I actually am able to make - maby my crochet-skills really are improving? I´m going to make more of those, using my handdyed einband... can´t wait to see how they turn out! One thing is sure, without this great tutorial by "Nature Nut Notes" I would never, ever been able to make this one...

so very cozy:

in light:

Monday, January 23, 2012

Star by nature

I´ve been spending A LOT of time on Pinterest lately... a dangerous thing, this Pinterest - you can spend so much time there, without even noticing! But I really do love that site, it´s so filled with great ideas and inspiration - I´ve been asking myself, at what point your head becomes overfilled with ideas?? Anyway, last week I found this pin... and thought, those twig-stars would be a fun and a pretty thing to do! A simple thing is so often the most pretty thing!

During a saturdaywalk with my boys and husband in the frosty winter-wonderland in Mosfellsbaer (where we live) we found some perfect twigs. Sunday, I made the stars... they are so simple and fun to make... all you need is:
twigs and yarn
a hot glue gun to fix the end of the yarn, if you roll it all around the star like I did ...

How to make them? You´ll see as soon as you look at the pictures... they are so very simple that you don´t even need an explanation!

The nice thing about those stars is, that you can use them in so many different ways - you just have to use your imagination... as a decoration-item on a gift (like I did), hang them in your window, on your front door (like I did)... do you have more ideas??

the 1. step: finding the twigs!


a basic-star (yarn: dyed with rhubarb)... as a decoration-item:

... covered with rhubarb-yarn (ends: fixed with hot glue) on my front door:

This is what we did with the remaining twigs: (yes, we are a bit desperate for
green leaves after all this snow and frost)
Our saturday walk in Mosfellsbaer: frosty, snowy and beautiful colours:
Mosfellsbaer (where we live here in Iceland)

Esjan (never looks the same - depending on the light)

Wednesday, January 11, 2012

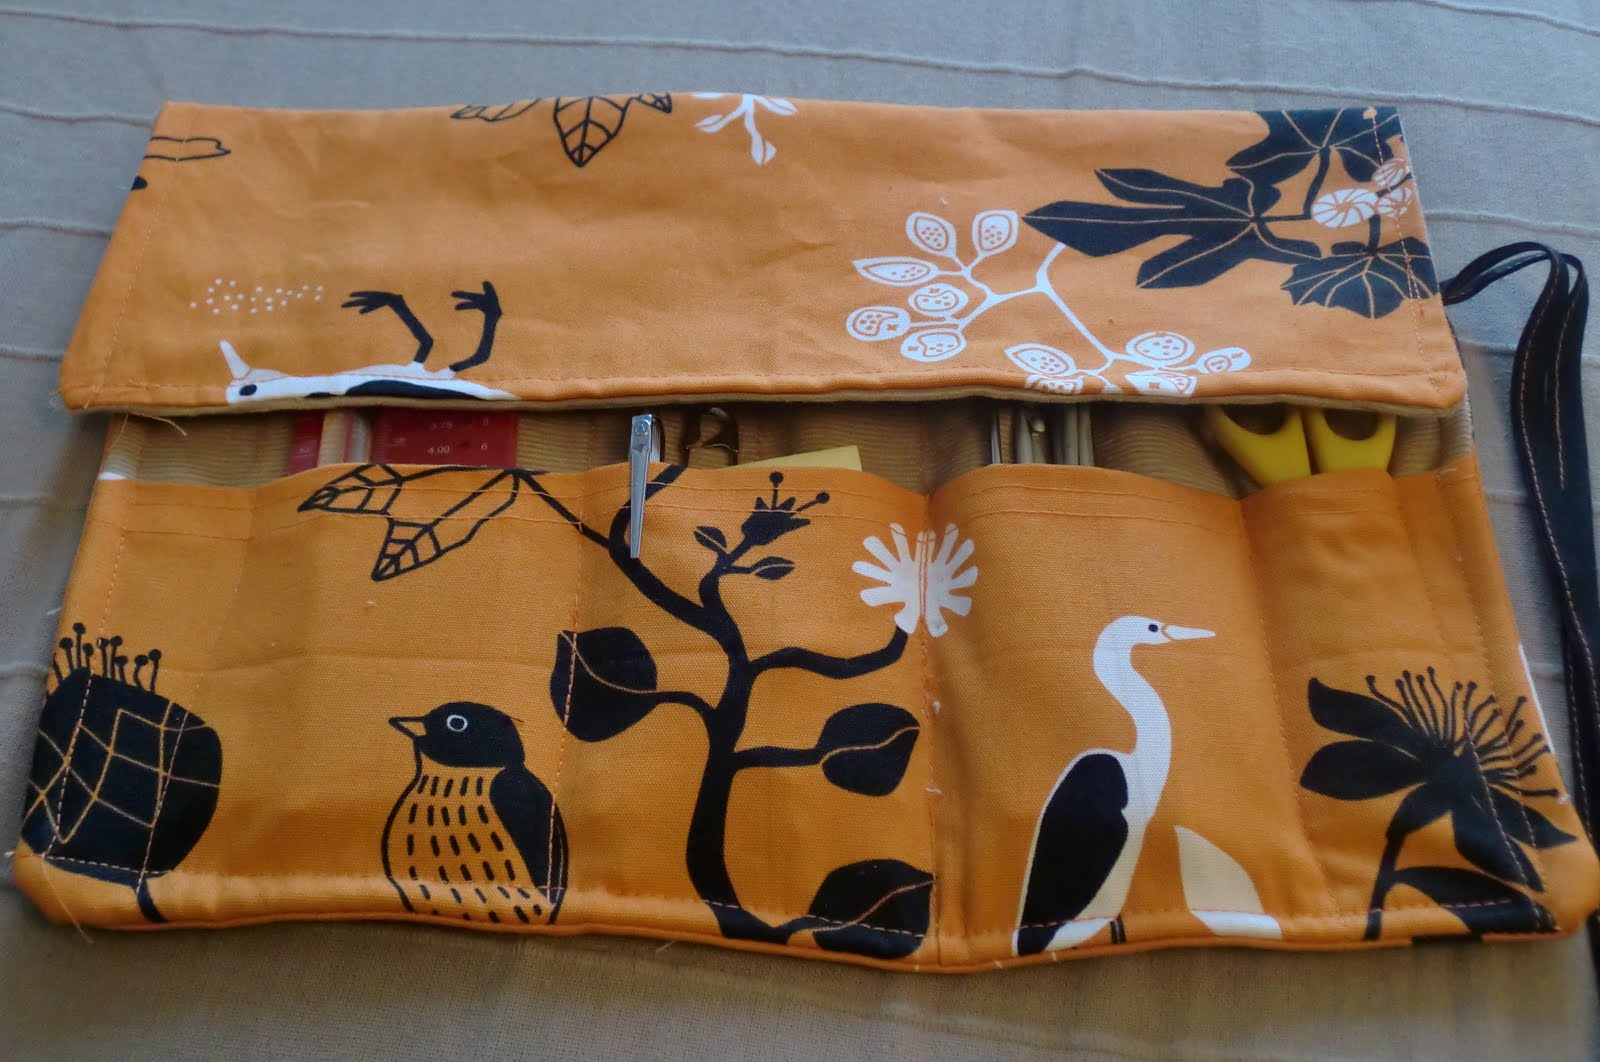
A knitting needle roll

It always goes on my nerves how my knitting needles are all lying in a big chaotic bundle in my knitting needle-case... if I want double pointed needles nr. 3,5 I´ll have to search forever... and if I´m lucky enough I´ll find 5 of them...
Therefore I´ve been searching a good, free knitting needle roll-tutorial on the internet for a while now - and today the big day arrived: I finally made my very own knitting needle roll, mixing up those 2 tutorials: madebyloulabelle and lupinbunny.

I had to adapt the roll to my needs, since I never, ever use those 2, really long needles... this is the result and I´m really happy with it. The only thing I would do different next time is, to use thinner fabrics... maby just a thick one for the outside and thinner ones for the rest.

At last, I can find all the needles I need... I just can´t wait to make another one for my circular needles... just have to find the right fabrics...

open:

closed:


everything has it´s own, special place:

ahhh... finally some order...

all rolled up...